How to use Godot's AStar2D for path finding
Hello everyone! The last tutorial I made (it was on using SilentWolf as a way to make a scoreboard in your game) helped some people, and I also got some nice feedback, so I'll try to make some more guides. This time I'll be talking about how to use Godot's AStar2D class for implementing some very nice path finding in your games.
This is quite useful for tile-based roguelikes for instance, or for other kind of tile based games, like Pokémon Mystery Dungeon!


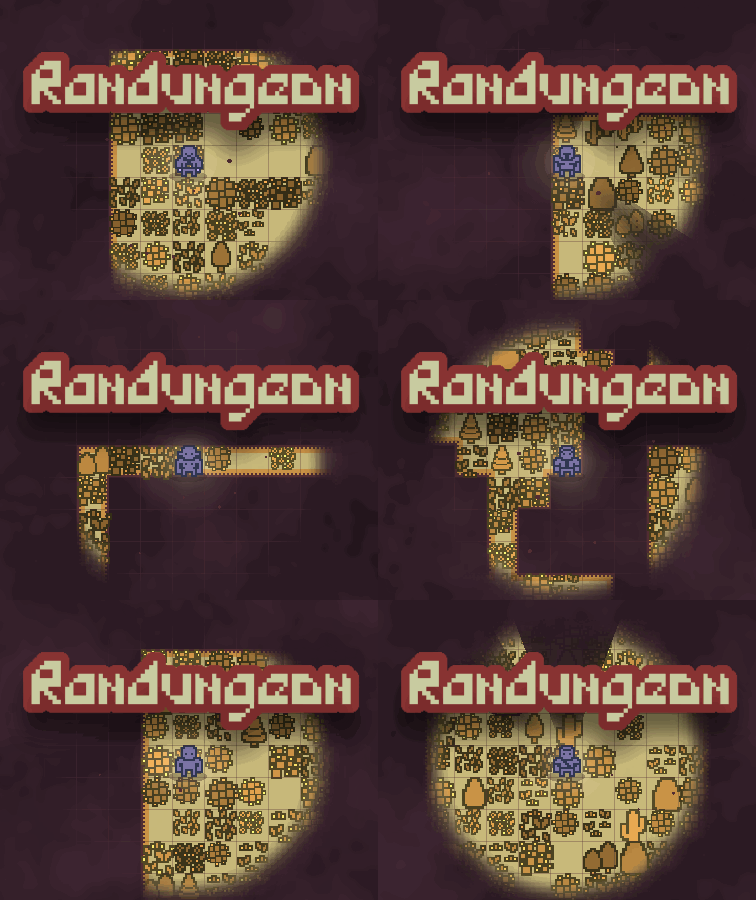
In our case, we've used it for Randungeon, a quite simple roguelike. Feel free to play it by clicking here :)

Okay, that's enough for application and other fluff. We'll start by studying the algorithm a bit. I'll not really try to explain how it works, but instead will focus on its strengths and limitations. Notice that you skip this part and go directly to the coding, if you want :)
About the AStar algorithm
The AStar algorithm, or A* algorithm, is an algorithm used for transversing graphs and path finding. Removing the fancy talk, it is a algorithm that can be used to find the "best path" from point A to point B. Usually with "best path" we mean the shortest path, but that can be configurated: for instance, we can take not the shortest path, but the path with least height change, in case your game features terrain with different heights.
It is not only relatively simple, but also quite fast and effective. A really good all-around option for path finding! The complexity (aka how hard the computer will have to work to find the best path) grows like b^d, where b is the number of possible paths at a certain position, and d is the "depth" of the path, that is, how many times it'll be needed to iterate over the possibilities in order to find the best one.
In simple english, let's say you have points A and B. In point A you have an enemy, and in point B you have the player, and we'll use AStar to find the shortest path for the enemy towards the player. Supposing your actors can move in 4 directions in a grid, then b=4 and d will be more or less the distance between the enemy and the player. The more they are separated, the more possible paths there are, and the slower this method will be!
Okay, so that's a good rule of thumb on the limitation of this algorithm I believe. With a better idea of how it works, now we should be able to implement it on Godot, which is actually quite easy!
How Godot's AStar is used
Godot's AStar2D class is quite powerful, and it has a bunch of useful and interesting methods. With that said, we will use only a few of them: they'll be enough to give us an effective path finding method. Also, we'll need to write some functions in order to keep the code cleaner. In case you don't understand one or two of them, feel free to leave a comment or send us an email, it'll be no problem to help you :)
We will use the AStar2D class like this:
- Everything relevant to the path finding will be inside a Tilemap2D node. In it, we'll add a simple tileset, that will be used only for drawing in which tiles we have a valid path.
- To the Tilemap2D node we'll have a script that will do two quite important things:
- It will tell a AStar2D object how the map is like (that is, which tiles are passable and which are not);
- And it will tell any other node the best path for it to go from where they are towards a certain point. In other words, the enemy will ask the Tilemap2D what's the best path towards the player when needed!
And that should be it! Of course when we start coding it will look a bit tougher, but the gist is the same.
Okay, let's finally implement it
Start by creating a Tilemap2D on your scene, and attach any tileset to it. We will have that any tile you place will be a valid tile, and the rest of the cells will be invalid.


Next, we will write some code in order to tell the AStar2D which cell are valid, and which ones are not. It will actually be quite simple!
Step #1: Creating the Tilemap2D node
We'll start by creating a new script for the Tilemap2D, and declaring a variable that will hold our AStar2D instance.
extends TileMap
var aStar:AStar2D
func _ready()->void:pass
In case you don't know what those "->void" and "AStar2D" things are: recently in Godot it was added the option to "type" your code. When I say "type" it is not like in "typing at the keyboard", but as saying the type of each variable. For instance, is a certain variable a string? A float? A AStar2D instance? Et cetera.
Typing your code has some nice advantages:
- If I recall correctly, in the future your games will run faster by typing your code;
- You'll get better predictions from the engine (like when you start typing the name of a method and Godot automatically suggests what method you were writing);
- You'll look like a better coder :)
Step #2: Setting up the AStar2D
Okay, with that said, now we will tell which tiles are valid to the AStar2D variable.
First, inside the _ready() function, we instantiate the AStar2D class into our variable. We also get the size of our map with the method get_used_rect().size from the Tilemap2D. Also, we "reserve" a certain space for the information with the method aStar.reserve_space(numberOfTiles).
var size = self.get_used_rect().size
aStar = AStar2D.new()
aStar.reserve_space(size.x * size.y)
Now the fun begins: we'll fill the reserved space with the cells of our tilemap. This can be done using the aStar.add_point() method: it takes an id value (which must be unique, it's like the name of the cell), and the position of the cell in global coordinates.
It's useful creating our first helper function: it gives us a unique id for each cell. I created this one:
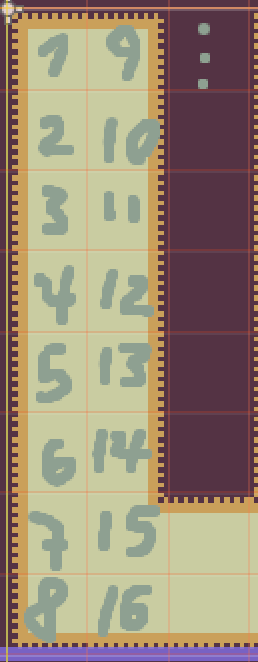
func getAStarCellId(vCell:Vector2)->int:return int(vCell.y+vCell.x*self.get_used_rect().size.y)
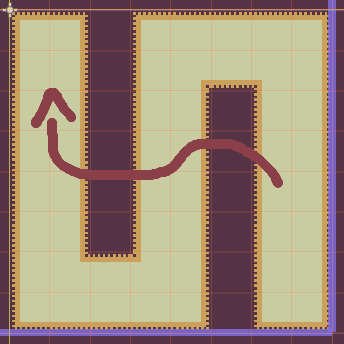
It looks strange, but basically it counts all the tiles on the first column, then all the tiles in the second, then all the tiles in the third, and that's it!

Using it and the aStar.add_point() method, we can iterate over all the cells in order to fill the reserved space:
for i in size.x:
    for j in size.y:
        var idx = getAStarCellId(Vector2(i,j))
        aStar.add_point(idx, map_to_world(Vector2(i,j)))
Step #3: Telling the AStar which cells are valid
With the AStar populated, now we need to tell it which tiles are valid. We can do this by, once again, looping over all tiles, and this time we will take into account the kind of the cell we are in. As I said earlier, if it is a empty cell, then it will be invalid: otherwise, everything's ok and it will be valid! This means we will only consider the cell valid if get_cellv(Vector2(i,j))!=-1, where (i,j) is the cell's position.
If the cell is valid, we iterate over its neighbors: up, down, left, and right. For each one, we check if it is a cell on the reserved space. Finally, if it is, then we connect the cell we are currently in with that neighbor cell. This might be a bit strange, so if needed I recommend you reading it once or twice more!
The code for me ended up like this:
for i in size.x:
    for j in size.y:
        if get_cellv(Vector2(i,j))!=-1:
            var idx=getAStarCellId(Vector2(i,j))
            for vNeighborCell in [Vector2(i,j-1),Vector2(i,j+1),Vector2(i-1,j),Vector2(i+1,j)]:
                var idxNeighbor=getAStarCellId(vNeighborCell)
                if aStar.has_point(idxNeighbor):
                    aStar.connect_points(idx, idxNeighbor, false)
Observation: on the second loop, the one over the neighbors, you can add the diagonal neighbors too. If you do that, you are allowing the path finding to make diagonal movements between tiles! I'll leave that as a exercise for you, in case you are interested. Once again, feel free to ask questions in case you have a hard time!
I suggest that you add the code for creating the grid and filling it with information in a function, and calling this function inside your _ready() function for the TileMap node. In my case, so far the beginning of my code looks like:
extends TileMap
var aStar:AStar2D
func _ready()->void:
     aStarStart()
func aStarStart()->void:
     var size=self.get_used_rect().size
     aStar=AStar2D.new()
     aStar.reserve_space(size.x * size.y)
     # Creates AStar grid
     for i in size.x:
         for j in size.y:
             var idx=getAStarCellId(Vector2(i,j))
             aStar.add_point(idx, map_to_world(Vector2(i,j)))
     # Fills AStar grid with info about valid tiles
     for i in size.x:
         for j in size.y:
             if get_cellv(Vector2(i,j))!=-1:
                 var idx=getAStarCellId(Vector2(i,j))
                 for vNeighborCell in [Vector2(i,j-1),Vector2(i,j+1),Vector2(i-1,j),Vector2(i+1,j)]:
                     var idxNeighbor=getAStarCellId(vNeighborCell)
                     if aStar.has_point(idxNeighbor) and not vNeighborCell in aSolidCells:
                         aStar.connect_points(idx, idxNeighbor, false)
Step #4: Telling the AStar which tiles are occupied
Ok, so far we were able to create a AStar object, create and fill its grid, and tell it which tiles are valid and which ones are not valid. The next step will be to add the player. This is quite simple of course, but we need to consider a small but important detail: we don't want to have two "actors" on the same tile in our game, that is, we don't want to have overlapping enemies for instance.
We can prevent this by telling the AStar object which tiles are occupied, and when the actors move, they empty the old tile while occupying the new one. Two helper functions will help us with this: one will occupy a AStar cell at a certain global position, and the other will free a AStar cell at a certain global position.
Notice that we won't need to tell what is occupying that cell, we only need to say that that cell is occupied or free. What I'm trying to say is that we don't need to say where the player is or which tiles are enemies: we only need to manage the cell's occupations!
Anyway, the helper functions will be:
func occupyAStarCell(vGlobalPosition:Vector2)->void:
     var vCell:=self.world_to_map(vGlobalPosition)
     var idx:=getAStarCellId(vCell)
     if aStar.has_point(idx):aStar.set_point_disabled(idx, true)
func freeAStarCell(vGlobalPosition:Vector2)->void:
     var vCell:=self.world_to_map(vGlobalPosition)
     var idx:=getAStarCellId(vCell)
     if aStar.has_point(idx):aStar.set_point_disabled(idx, false)
Pay attention to the use of the function aStar.has_point(): it helps us to occupy/free only cells that actually exist, and I believe that will help you avoid some possible bugs in the future :)
Quite important observation: These functions will be used directly by the actors in this guide. Depending on how you coded your grid, these functions being called by your "grid manager" or anything like that will be a more interesting choice, however.
Since the way you coded your actors is quite possibly different from mine, you'll possibly make use of these functions differently. In my case, whenever the player moves, it empties the tile they currently are in, and occupies the target tile. The idea is the same for the enemies: whenever they move, they empty their current tile and occupy the target tile (that will be given by the AStar -- we are quite close to getting to this!).
Just as an example, here's a part of my enemy movement code, with some simplifications here and there. Ignore the path finding stuff for now! It will be explained quite soon:
# Function called whenever
# the player finishes their turn
func act()->void:
     if bSawPlayer:
         # This variable holds an array
         # with the path towards the player.
         var path=global.tilemap.getAStarPath(self.global_position, global.player.global_position)
         if path.size() > 2:
             # This isn't important for now...
             path.pop_front()
             var vTarget=path.pop_front()
             vTarget.x=16*int(vTarget.x/16)+8; vTarget.y=16*int(vTarget.y/16)+8 # Fixes the target position since I coded the grid in a bad way
             # Here is the important stuff!
             self.freeAStarGrid(self.global_position)
             self.occupyAStarGrid(vTarget)
             $animationPlayer.play("animationActorMoving")
             self.moveTo(vTarget)
         else:
             # This "if" checks if the enemy
             # is right next to the player,
             # so that it can attack
             if tilemapAStar.are_points_connected(global.tilemap.getAStarWorldVectorId(self.global_position),global.tilemap.getAStarWorldVectorId(global.player.global_position)):
                 self.attack(global.player)
Ok, for this part the heavy lifting is mostly on your side. However, we are quite close to getting to our objective, that is, giving our actors a good path for going from point A to point B! Let's keep going.
Step #5: Asking the AStar for a path
Supposing that you managed to add a call to the freeAStarGrid() and occupyAStarGrid() functions, now all that is left is to tell our actors the best path given two points. Godot makes this surprisingly easy: we just need to use the function aStar.get_point_path(). It takes two cells' IDs as argument, and will return an array with the path between them.
However, we can use it in a more friendly way, by creating a function that accepts global_positions in place of the cells' IDs. This way, we can simple say, for instance, where the enemy is, where the player is, and get the path (opposed to getting the enemy's cell ID first, then the player's, then get the path...).
There's not much to explain, since I believe the code below more or less explains itself 😅 the idea is that we pass two global positions, then get their equivalent in the tileset coordinates, then their IDs for the AStar grid, and finally we get the path.
func getAStarPath(vStartPosition:Vector2,vTargetPosition:Vector2)->Array:
     var vCellStart = world_to_map(vStartPosition)
     var idxStart=getAStarCellId(vCellStart)
     var vCellTarget = world_to_map(vTargetPosition)
     var idxTarget=getAStarCellId(vCellTarget)
     # Just a small check to see if both points are in the grid
     if aStar.has_point(idxStart) and aStar.has_point(idxTarget):
         return Array(aStar.get_point_path(idxStart, idxTarget))
     return []
Okay, so now we can get a path between two points. How can we use it?
Once again, this isn't really hard. First, it is possible that there simply is no path possible: if that's the case, we will end up with an empty array as a path. However, if there is a path, then it will have at least two points: we can say that because both the start point and the end point are considered as part of the path!
So, for instance, if you have a situation like this in your game,
|🐱🏍| _ | _ |👺|,
then the path will have include four points. In case you have something like
|🐱🏍|👺|,
then it will have two points, as mentioned.
This is important to notice because it tells us that we should always check if the path returned has a size greater than 2: if it doesn't, then either there is no path, or the enemy is right next to the player, and it should attack instead of move.
So, let's suppose we get a path array with 5 entries. The first point is the starting point itself, so it isn't really interesting for us to consider it when moving. We can remove this first point using the pop_front() method of the array. It is a quite interesting method: it removes the first entry of the array, and returns it. If that isn't clear, the important thing is that we can use it to get the first relevant point of the path!
With all this information, considering an enemy scene in our game, we could write something like:
# Function called whenever
# the player finishes their turn
func act()->void:
      if bSawPlayer:
          # This variable holds an array
          # with the path towards the player.
          var path=global.tilemap.getAStarPath(self.global_position, global.player.global_position)
          if path.size() > 2:
              path.pop_front() # This removes the starting point from the path
              var vTarget=path.pop_front() # This gives us the point towards the enemy should move
              self.moveTo(vTarget)
          else:
              # This "if" checks if the enemy
              # is right next to the player,
              # so that it can attack
              if tilemapAStar.are_points_connected(global.tilemap.getAStarWorldVectorId(self.global_position),global.tilemap.getAStarWorldVectorId(global.player.global_position)):
                  self.attack(global.player)
Step #6: Testing!
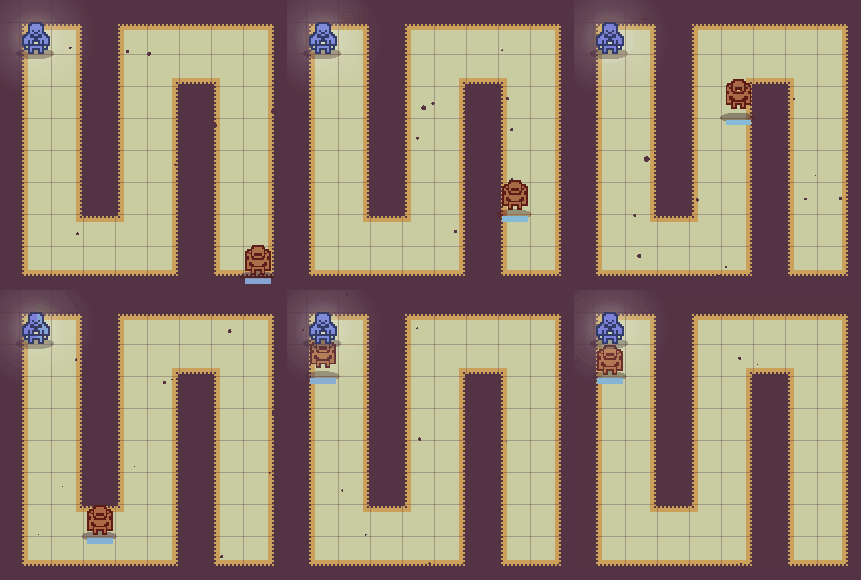
Great! Now, if we test everything...

Please note that I implemented diagonal movement!
Step #7: Well, everything's done
So, that's it! By now you should be able to implement and use the AStar2D class on Godot without much problems. It is possible you have a question or two however, specially since this tutorial was more or less a guide instead of a proper tutorial. If that's the case, feel free to drop a comment below, and I'll try to hlep you out.
When I started working on Randungeon the path finding was almost a deal breaker for me, since I did not find much resources on it and it seemed quite daunting as well. I hope that this tutorial helped to make it clear that, in Godot at least, path finding is more or less quite a breeze!
Thanks for reading! Feel free to leave some feedback below as well, so that future tutorials are better :)
Get Randungeon
Randungeon
Roguelike with random characters
| Status | Released |
| Author | Escada Games |
| Genre | Role Playing, Adventure |
| Tags | 2D, Casual, Exploration, Minimalist, Pixel Art, Roguelike, Short, Singleplayer, Top-Down |
Comments
Log in with itch.io to leave a comment.
How did you make your own map? i used a node to create a grid but it's full of bugs. Because tilemap is anymore.
I keep coming back to this article everytime I need a refresher on how to handle the Astar2D (instead of AstarGrid2D im used to). thank you very much.
Hey, glad to know this old guide still is helpful to someone! You are welcome 🙂
Yo. Thank you, I did a isometric game. But I don't understand, how do I can use "occupyAStarCell(vGlobalPosition:Vector2)"? In "getAStarPath(vStartPosition:Vector2,vTargetPosition:Vector2)":
a method of "aStar.has_point(idxTarget)" will be False, because idxTarget became "if aStar.has_point(idx): aStar.set_point_disabled(idx, true)". And enemies don't can find way to "player.global_position" thank "aStar.set_point_disabled(idx, true)"
Glad it helped you :)
This is a really old guide of mine, so I don't remember most of the stuff in it anymore. But from what I recall, the naming isn't exactly intuitive. A disabled cell means that there's something occupying it, so we should not use it won't be used as a valid path for the path finding.
When we are right next to the player, then we can check if the cells are connected, and if they are, instead of moving, the enemy will be attacking the player.
I hope this helps!
thanks, but instead I did a check to see if there is an entity in the next tile. However, I have a strange bug, for some reason the enemies "fly around the map" at a random moment on a distant tile
What tween settings did you use for movement? they're so nice!
Hey, thanks! I think I'm too late with this answer, sorry. But anyway...
$tween.interpolate_property(self,"global_position",self.global_position,vTarget,0.2,Tween.TRANS_QUINT,Tween.EASE_IN_OUT)
Just wanted to say - this tutorial was really useful, thank you so much.
Whoa, thanks! Really glad to be of help!
what is that?
Hey, good question! If I recall correctly, it has the same purpose as getAStarCellId(), but it takes a global position as an input.
Thank you very much for the guide! Could you let me know how you got animations to work when moving between tiles, rather than snapping?
Sure! Basically, I use a Tween node to handle the animations. The Tween node might as well be my favorite node, it really, really is veeeeeeeeeeery useful. If I had one, I would use a t-shirt saying how much it is useful.
Anyway, in this case, you'll be using it more or less like this:
The lines where the animation is setup and started are the ones that start with $tween.
So, the interpolate_property() method might seem a bit daunting, but once you start using it, it will make a lot more sense. Putting it simply, it takes a bunch of arguments that'll say things like the duration of the animation, its beggining, end, etc. Here's a brief description of the most relevant ones:
You can also use tweens to control properties such as transparency, color, scale, and rotation!
I hope I helped you a bit more! Thanks for reading this guide too, glad to be helpful!
Thank you kindly for the detailed reply! You've also brought to my attention that I should be making my life easier with a State Machine hehe. Cheers :D